Preserving Highlights with Photoshop
by James Morrissey
This article is Copyright 2005 James Morrissey and may not, in part or in whole, be reproduced in any electronic or printed medium without prior permission from the author. For information on reproducing any part of this review (or any images) please contact: James Morrissey
The digital revolution has changed the way that we take pictures. In truth, digital photography makes many of us much more daring then we ever would have been when we were shooting film because we can delete anything that did not come out the way we originally planned.
However, there is one area of digital that can be incredibly frustrating - blown highlights. This is the bane of digital photography. In this respect, digital photography is very much like shooting slide film. There is very little exposure latitude and as a result, one must be ever vigilant about washing out highlights. Because of this, many photographers default towards underexposure - often by a stop or more.
While it is a good idea to meter on the side of safety, it means that in addition to being a good photographer, we are now required to do a lot more of our own 'darkroom' work because most labs still have not really figured out how to process digital photographs in a satisfactory way. Also, when we brighten up the files that we have deliberately underexposed, many people wind up blowing out the highlights anyway.
I learned this method from my friend, Jeff Caplan, at the Digital Wedding Forum. I initially used it on wedding dresses to help preserve dress detail when brightening, but very quickly began adopting it to my wildlife and nature photographs as well.
Photoshop CS has a Shadow/Highlight tool that serves as a great mechanism for the correction of over-exposed photographs. It provides a quick and effective method for restoring photographs without the need for getting one's hands dirty. I have found, however, that the Shadow/Highlights tool cannot always get the job done in a way that I am satisified with, and I wind up using this method - sometimes in conjunction with the Shadow/Highlight tool. The method is as follows:
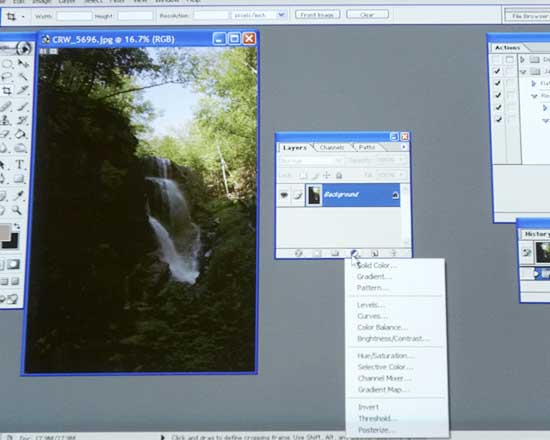
(1) Open up the original file. As I shoot RAW, I normally massage the file as much as possible prior to having to deal with Photoshop. Click on the black and white circle in the middle of the toolbar that has your layers, channels, paths, etc.
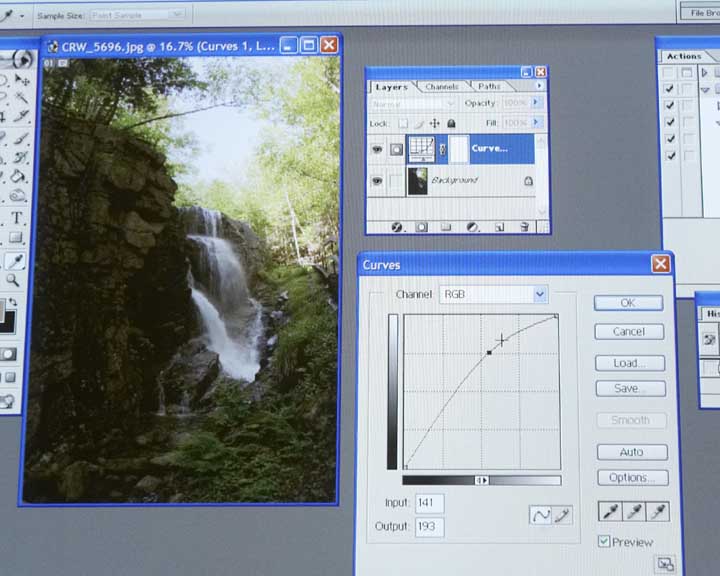
(2) You have created a layer mask that you can use to brighten up your image.
(3) Click on the brush tool. Make sure that the color you are painting with is black. Draw over the areas that you want to restore the original image from.
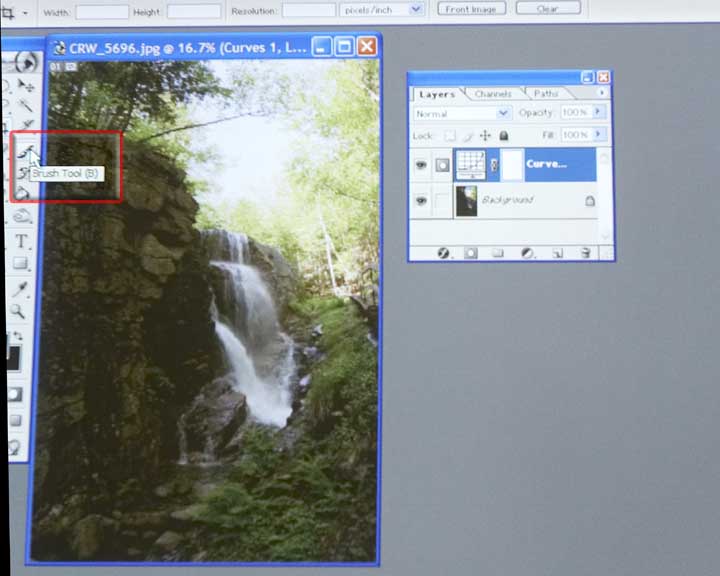
(4) Using the Opacity Slider, choose the percentage of the background that you want to subtract. 100% will take you back to the original.

The results of this process can be seen in comparing the two images below - one with just curves compensation and the other using the additional layer.
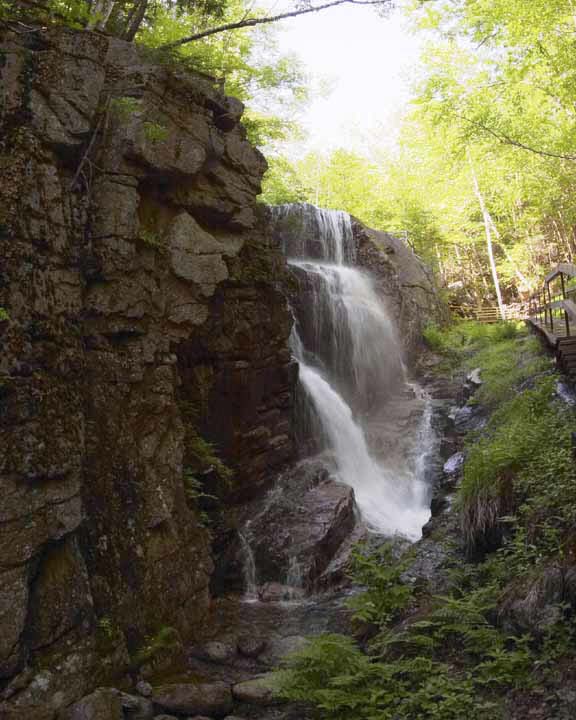
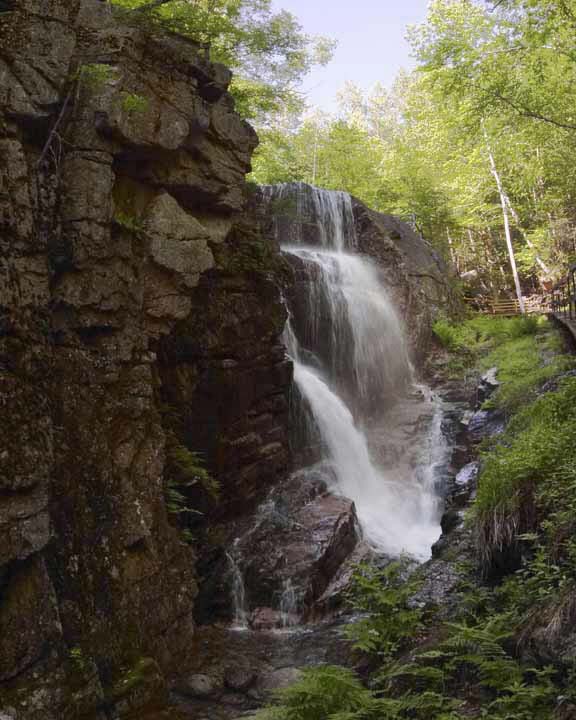
Picture A Picture B
The
Flume Gorge with Curves Compensation. The Flume Gorge with Multiple
Layers
Look at the sky and see how washed out it is. The sky is preserved
in this photograph.